Last updated on February 13, 2026
How To Set Up A Leave Request Notice Period?
The Leave Request Notice Period automation lets you require employees to give advance notice for longer leaves — so you have time to plan around their absence. Set it once and the rule enforces itself on every future request.
What It Does
Implements and automates a policy where employees are required to provide advanced notice for longer amounts of leave. Vacation Tracker checks the duration of each request against your rule, and if a User isn't giving enough notice, the request is blocked.
Watch the tutorial
Vacation Tracker has a YouTube tutorial walking through this automation:
Steps
- Log in to your Vacation Tracker account at app.vacationtracker.io/signin.
- On the left-hand side, click Workspace Settings → Add-ons.
- Click View on the Leave Request Notice Period card under My Add-ons. If you haven't subscribed yet, switch to the Discover More Add-ons tab and select Leave Request Notice Period there. (If your subscription has lapsed, you'll see a "Re-subscribe Add-on" banner instead.)
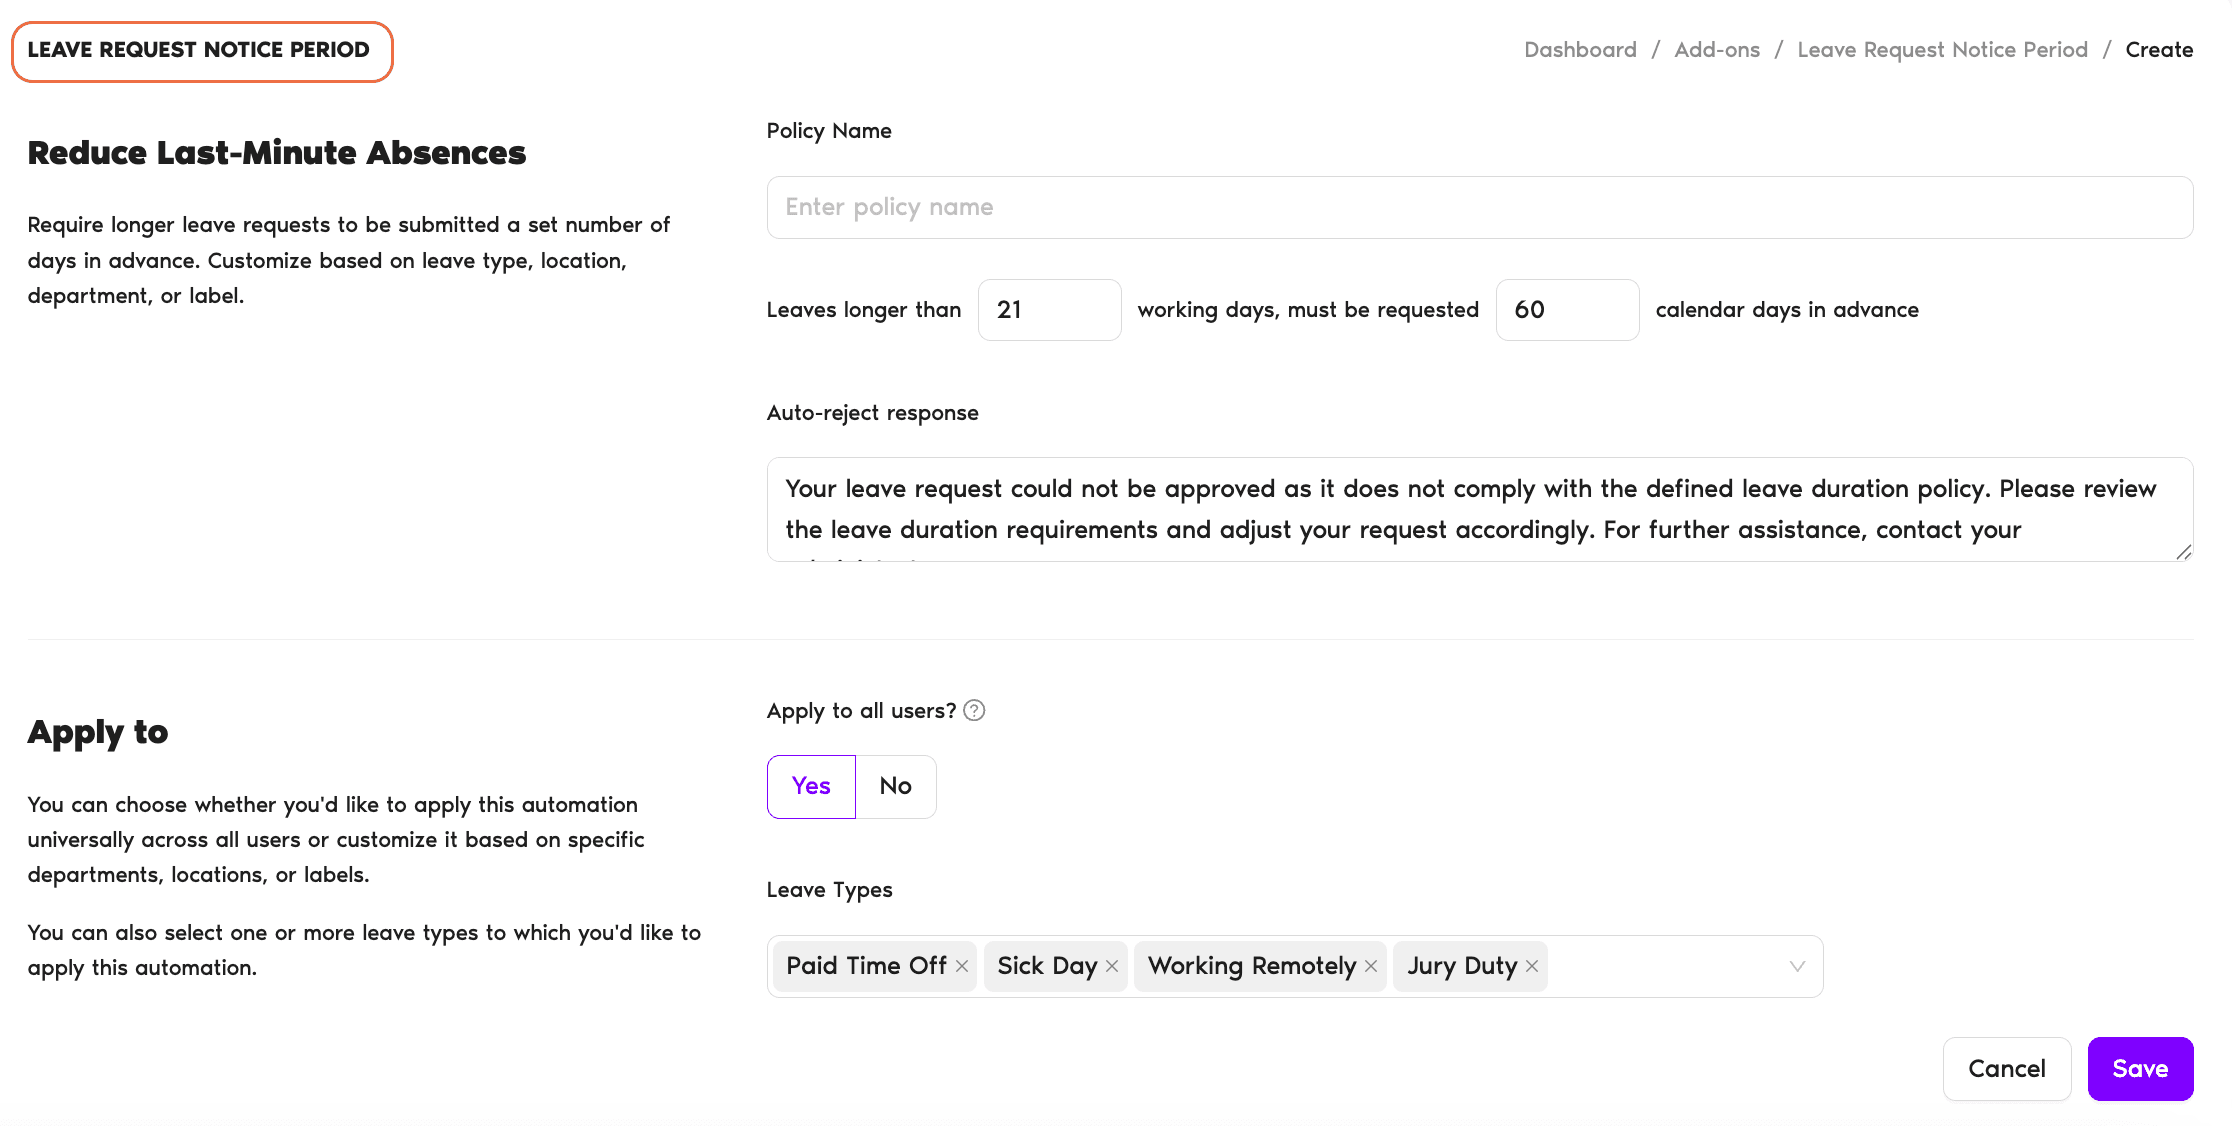
- Click Create policy in the top-right corner.
- Configure the rule — set how much notice is required for which leave duration, and which Locations / Departments / Leave Types it applies to.
- Save the automation. From that moment, leave requests that fall short of the notice period will be blocked at submission.
Where the Rule Applies
Notice Period rules can be scoped:
You can run multiple Notice Period automations side by side — one for short leaves, one for long ones, etc.
 Book a Call